SMS sendout
Table of contents
When you have a set list of respondents that you want to reach by phone, we recommend sending the survey via a SMS sendout. It is easy to set up and perfect for sending automatic reminders to people who have not yet answered the survey.
Please note: There are additional charges for SMS sendouts.
Do not want to read? Watch the tutorial:
How to create a SMS sendout
We have covered how you go about when wanting to send your survey, now let’s go into depth on how you distribute your survey via SMS.
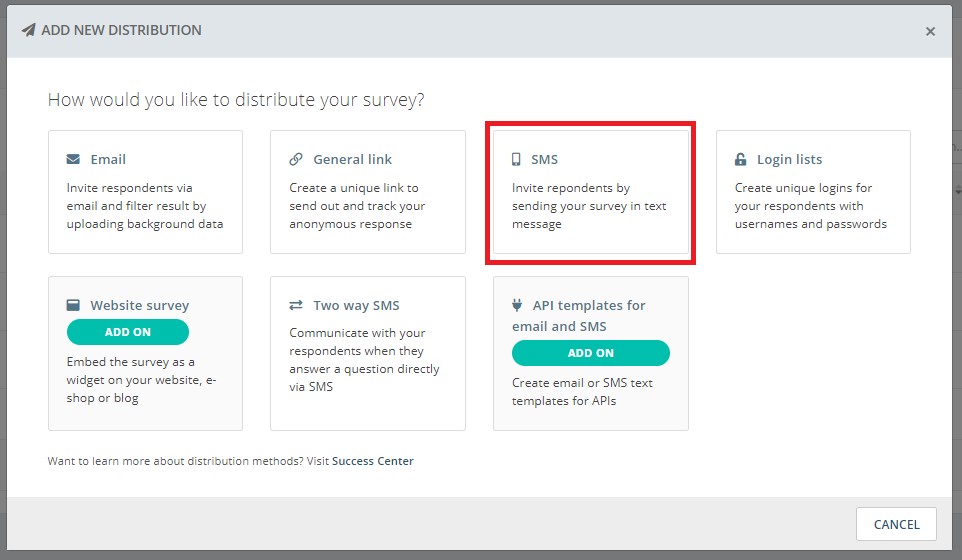
The SMS sendout panel is very similar to the email sendout panel, except we work with numbers instead of email addresses.
Edit name of sendout
By clicking on the header text “SMS Sendout” you can edit the name of the sendout you are working on. This will be useful if you are working with multiple sendouts from the same survey. Changing the name of them to something easily identifiable is recommended. It is not a must, but navigation will be a lot easier if there is a date or specific name allocated to each sendout.
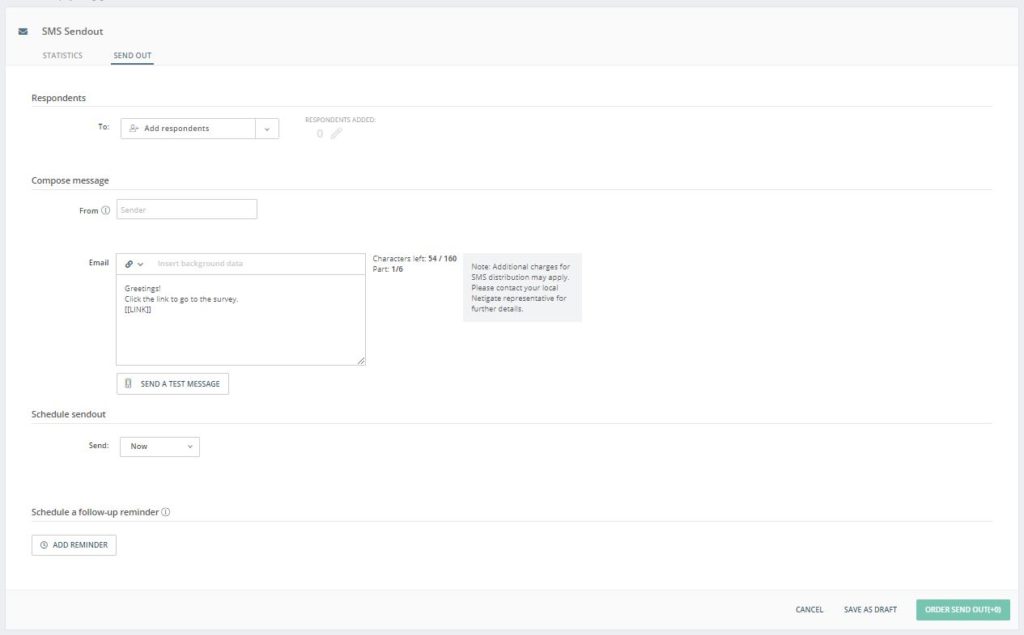
Respondents
The first section of the SMS sendout panel is where you add information about your respondents. By clicking the dropdown menu, you can choose to Add from file, Add manually or Add from respondent list.
Add from file: You can upload an Excel file containing telephone numbers that you want to send the survey to. In this list, you can include information about your respondents. This information is also called background data. You can read more about how to design the file and ensure successful upload here.
Add manually: This option allows you to easily copy and paste phone numbers from another source, such as Excel. The phone numbers need to be separated by a single line break.
Add from respondent list: Here you can select an already existing respondent list that you have uploaded and saved to your account.
Important: You will need to add all phone numbers with a country code and without any special characters or spaces. The correct format of the phone numbers is the following example: 46731234567.
You will see how many phone numbers you added to your sendout in the area called “Respondents Added”. If you have already added one or more phone numbers to your mailing list, you can manage these by clicking the pencil icon. Here you can, for example, delete added phone numbers from the mailing or edit information associated with phone number.
Sender of the SMS
In this section you will customise your sendout. Start by adding who and/or where the survey should be sent from.
The sender name will be displayed to the respondent alongside the SMS. There are some restrictions to the name because of telephone standards and protocols.
- Special characters cannot be used here. Use only letters (A-Z) and numbers (0-9).
- Spaces cannot be used here.
- Sender name can contain a maximum of 11 letters or 15 numbers
Compose message
In this text area you will enter your survey specific SMS text. This text is what the respondents will read before entering the survey.
We recommend that you have a very short greeting and invitation to the survey in this text. Read some of our tips on what to include in the sendout text here.
Important: To have a working survey link in your SMS sendout you will need to have [[LINK]] somewhere inside the text. Should you remove the link from the text you have the possibility to add it again by clicking on the link-icon in the top of the text box.
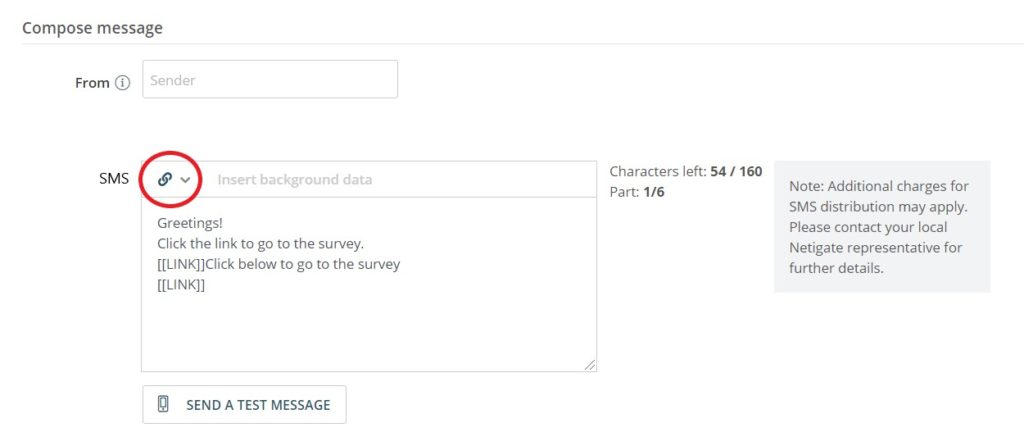
The SMS text is restricted by a character limitation. You may only use 150 characters in the SMS text. This is due to an official SMS protocol limiting the number of bytes that can be sent within an SMS message.
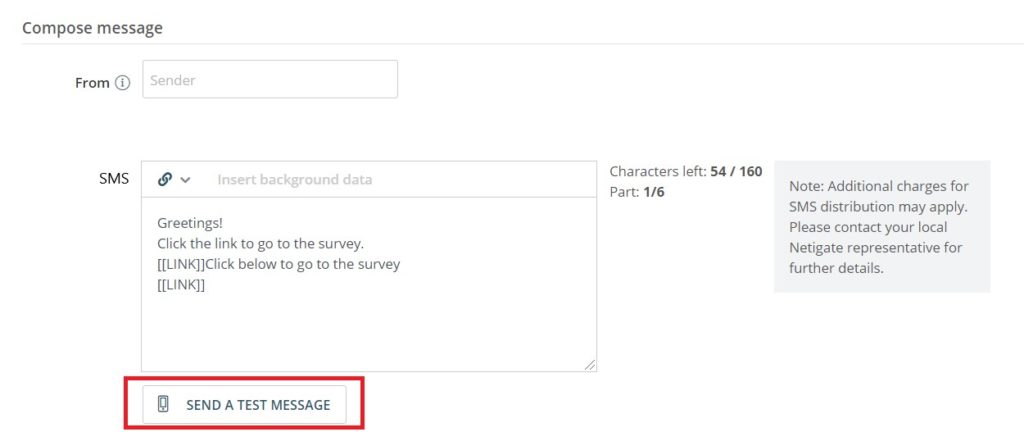
When you are happy with your text, you can send a test message to yourself or a colleague to see how it looks.
Schedule sendout and reminders
At the bottom of the page, you will find details about the Scheduling of your sendout. Here, you need to set a date and time when the mail should be sent. You can also create reminders. You can add several reminders in advance if you wish.

How to set up/edit a SMS reminder
After clicking Add reminder, you will be given the option to timestamp this and edit the SMS text. You do this by clicking the Edit Reminder button. You can also decide who should be eligible to receive a reminder by changing this from the Send to drop-down menu.
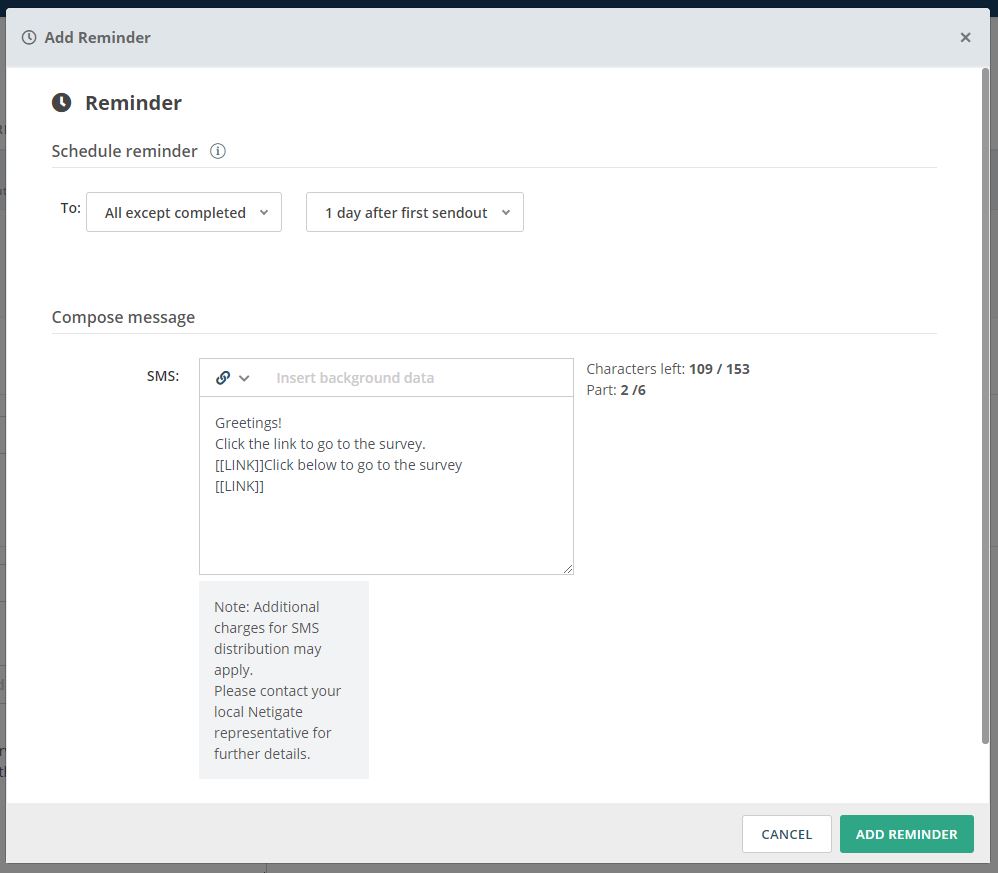
Please note: When in the distribution overview, you will see your SMS sendout and all the reminders you have set up. Clicking on Reminder will lead you to the original sendout. The reminder is only visible and editable by clicking Edit Reminder SMS.
Reminders can be set up before your SMS sendout, after your SMS sendout, or whilst the survey is active.
If you are using respondent lists, ensure that your list has uploaded correctly for the reminders to work as expected. You can read more about it here.
Order SMS sendout
When you are done adding respondents and compose your SMS and schedule sendout and reminders, simply click the Order sendout-button. The sendout will not be sent until the date of your scheduling. If this date has already passed, the sendout should be sent within 5-10 minutes from when it is ordered.
Before you order your sendout you can review the date of the phone numbers and reminders, as well as the number of recipients. When you click the Order button, you will be asked if you want to activate the survey right away (unless the survey is already active). Before any SMS can be sent, the survey needs to be activated otherwise your sendout will not be successful. Once you have ordered the sendout you will be redirected back to Distribution and should see a green or a blue circle in the sendout status, indicating that the sendout has been ordered.
Important: Should there be any warnings or information icons in your Order tab, there might be some information missing or information that you are being advised to double-check. You can hover your mouse over the Order sendout-button to see additional information.
Once you have ordered your sendout, you will be redirected to the distribution overview. This will show you a list of all the sendouts you have made before, including the most recent email sendout.

Can you please provide more feedback so we can make this article better?