Respondent list
Table of contents
Respondent lists are a great way of adding respondents to your survey sendout. A respondent list is a collection of data relating to the people you would like to send your survey(s) to. These lists typically contain email addresses or phone numbers, as well as any other information that will help you to create accurate reports with various filters and breakdowns. Some examples of additional information include department, region, or customer number. Using an Excel file either made by you, or exported from your CRM- or HR-system, it will only take you seconds to add respondents to your sendout.
Don’t want to read? Watch the video tutorial:
How to create a Respondent List
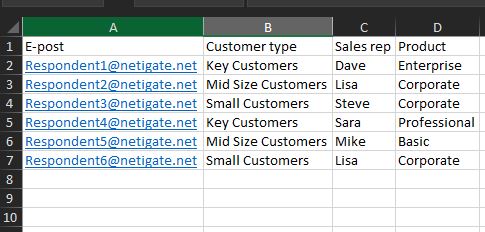
Respondent lists are most commonly used on a survey-by-survey basis. To create a respondent list, you will need to begin with preparing an Excel file in XLSX format. Column A should contain all email addresses, logins, or telephone numbers that you want to add to your sendout.
The following columns may contain all other known attributes for each respondent if you need them. Those characteristics can be information such as a name, gender, customer group, language, etc. Here is an example of what the Excel file should look like.
Important: The table must not contain empty rows or columns. You can leave a cell empty, but it is important that you have a value in each of the cells of Column A. Excel formulas and formatting must be removed before Netigate can successfully process the file.
Please feel free to use this picture as an example/orientation:

Here are a few tips for what you should look out for in the Excel file:
- E-mail/telephone number should always be in the first column (Column A).
- There should be no empty rows in the first column (Column A).
- E-mail addresses should be in the correct format and not include any blank spaces or special characters (other than @).
- Phone numbers need to be accompanied by a country code and include no blank spaces or special characters.
- No hidden rows or columns in the Excel file.
- No unnecessary formatting or formulas in the Excel file.
How to upload a Respondent List in Netigate
NOTE: In order for the file to be accepted by Netigate, the size of the file needs to be less than 1mb in all languages.
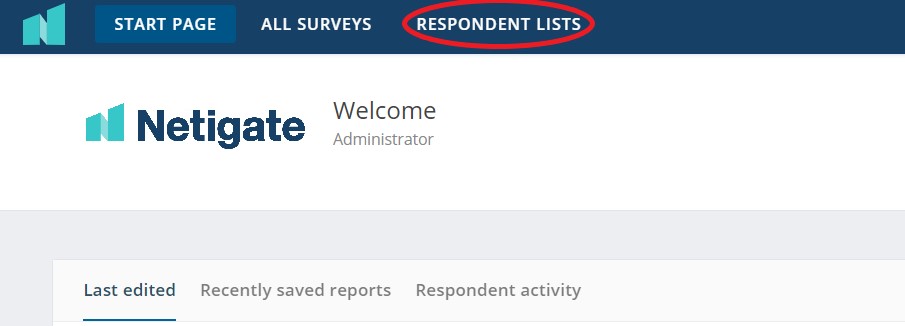
You can upload a Respondent List in two ways; either in the Respondent lists-tab in the main menu bar, or in your chosen distribution channel.
In the Respondent Lists tab you will always have an overview of all your uploaded respondent lists. These are also available when adding respondents to a sendout, just choose the Add from Respondent Lists option to access the already uploaded respondent lists.

Follow these steps to upload a respondent list:
| Respondent List tab | Distribution Channel | |
| 1. | Click the + Create new list button. | 1. In the respondent section click +Add Respondents |
| 2. | Name your list and add description if wanted. | 2. Choose Add from file |
| 3. | Click the Create List button. |
From here the approach is the same whether you are in the Respondent Lists tab or in a distribution channel:
- Upload Excel file from your computer.
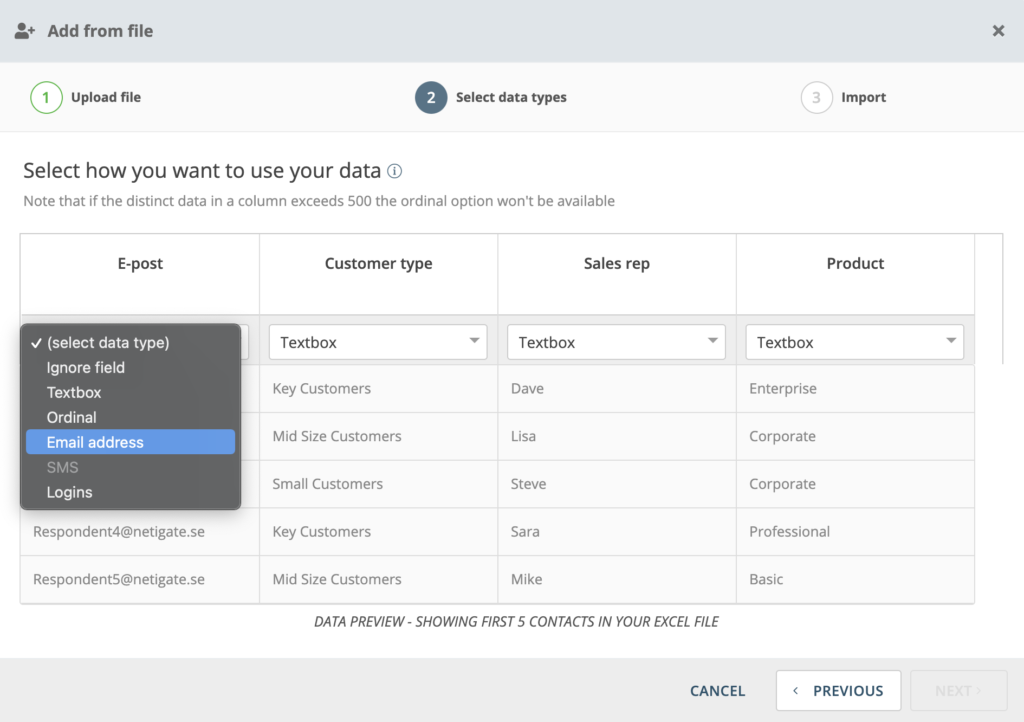
- Netigate will automatically sort your list into data types, but it is always smart to take a quick look at them to make sure everything is the way you want it.
- When clicking Next you will see a summary of your import as well as the option to Allow Duplicates or not.
Note: If you have duplicates in your list, those respondents will be contacted several times. For example, if an email address is listed ten times, it will receive ten invitations. If you are unsure, check Remove Duplicates. This prevents you from accidentally contacting your respondent multiple times.
Choose between the following options in the drop-down fields:

Ignore field
Select this option if you do not want to use the data in this column but did not deleted it from your source file.
Text box
Background variables are processed as text. The answers are processed as a word cloud. This option is recommended for unique identifying information (e.g. name, customer number, etc.).
Ordinal
Email address / SMS
Use one of these options in first column if you want to send emails/SMS to your participants. The email addresses/telephone numbers of your participants should be listed here.
Note: The options email address and SMS should only be selected for the first column and accompanied by the relevant information.
Logins
Only available with the Login distribution method. Choose ‘Logins’ in the first column if you want to create logins and distribute them to your participants.
How to send your survey to respondents
After adding your respondents to the send out for any of your surveys, schedule the send out and click the Order button to complete the process. Read more about how you send your survey here.
Can you please provide more feedback so we can make this article better?