Add background data to an existing sendout
If you already uploaded your respondentlist but forgot- or did not know how to add background data, you can add background data to an existing sendout later. You can also add additional background data to your respondents by following these steps.
Start by reading the articles on what a respondentlist is and what background data is before starting the following steps.
How to add background data to an existing sendout
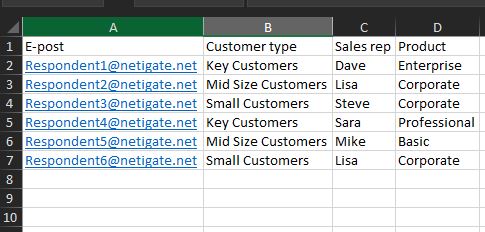
Start by opening your respondentlist file in Excel or where you created it. Like we have mentioned before, column A must contain the distribution method of the sendout – either email addresses for email sendout or phone number for SMS sendout.
Add your additional information about the respondents (background data) in column B and the following. These do not have to be in any particular order.
Note: you cannot have any empty cells in your list, as the system only reads the cells containing information. Therefor it will jump to the next cell containing information, causes the information to switch between the respondent it belongs to.
Save your document and go to the distribution panel of your survey. Choose the distribution you have already created and click the Sendout-tab in the distribution panel.

Upload your new respondentlist with the additional background data by clicking +Add respondents from file.

If the system recognizes some of the information that you previously added, you will be asked to put it in the right category in Map Data. If not, you will be sent directly to the Select Data Types-tab.
In the Select Data Types-tab, choose which columns you wish to use as background data, and should be added to your survey. These will not be visible to your respondents but will allow you to filter on them in the report later if imported as the option Ordinal from the dropdown menu.

The last step of the import is to choose whether you allow duplicates or not, and to check the box titled Update existing respondents if matched. This means that if any imported contacts match the ones you previously had in you first respondentlis, they will be automatically updated with the information added from the new list.

When the import is complete, go back to the Create section of your survey in Netigate. Click on the Question Bank button and select Background data from the list.

You will then see the latest respondentlist uploaded, and by clicking this, you will get an overview of all columns that you added in this new list. Select the ones you wish to add to your survey. You will be presented with a preview before you add the background data to your survey. Click Add and the information will be added to your survey.
Note: Information added as Background data will not be visible to your respondents in respondent view but allows you to filter on in the report later if imported as Ordinal from the dropdown menu in Select Data Types.
Can you please provide more feedback so we can make this article better?