Website survey widget
Table of contents
What is a Website Survey Widget?
A website survey widget allows you to install a survey onto your website or mobile app – anywhere that accepts Javascript code. This article presents you with some advanced settings for your website widget. Below is what the widget might look like on your site:

How to create a website widget
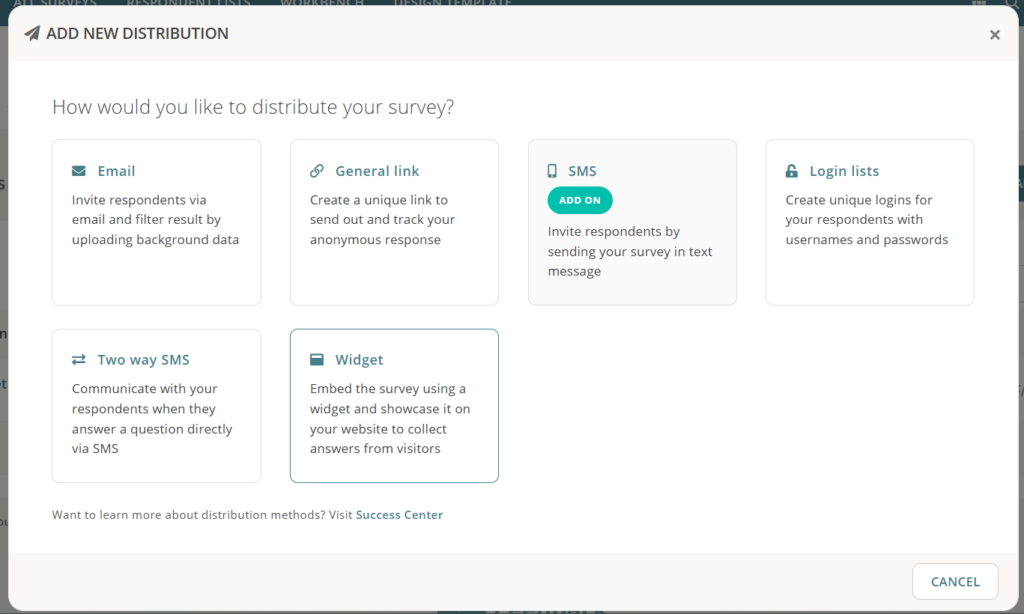
To get started, go to the Distribution area for your selected survey and click on Widget.
You will be redirected to a Widget distribution method page with all settings set to their default values.
Note: The Widget survey distribution is included in some Netigate licenses, but it can also be acquired separately as an add-on. If you do not see the Widget distribution and would like to add this feature to your package, please contact your account manager.
Activating your website survey widget
Activation: Turn this off to temporarily deactivate the widget independently of the rest of the distribution methods. This setting is activated by default.
Widget settings
Supported question types:
- Radio button
- Net Promoter Score (NPS)
- Open text answer
- Dropdown
- Matrix
- Checkbox
- Star rating
- Slider
Questions are defined from your survey itself. You do not manage the question types from the Widget itself, but if the questions in your survey are not apart of the above list, the widget will not display your questions properly. Please consult our doc on adding questions to change the questions used in your widget.
The widget settings are split into five parts: Display Widget, Widget Styles, Button Styles, Domains, Configuration
Display Widget
This section determines how the widget will “appear” to customers on your website, what effect will it use to display to your customers.
-
- This option will trigger the survey to pop up on the screen when the respondent presses the fixed positioned button displayed on the page.
-
- This option will trigger the survey to slide in on the screen when the respondent presses the fixed positioned button displayed on the page.
-
- This option will automatically show the widget as a modal when it’s triggered by your customised events.
- If you choose this, custom events must be defined for the widget to appear properly
- Custom Trigger: Add ID to a custom trigger, such as button or link. Buy using this low code approach you can trigger the pop-up modal with the survey with out needing to code Javascript. Both HTML id and class can be used to assign a trigger.
- Use the end of this doc to learn more about Custom Triggers.
-
- This option will allow the survey to live installed onto the site itself – as a button or similar field.
- The exact field is defined from the Widget Position parameter, as described below.
- Embedding: We recommend that you use a Domain with Embedding, as that will prevent the Widget from trying to appear on a page that does not have the HTML element you are embedding onto (see Domain section further in the doc).
- Widget Position
- This option is only required when you use the Embedded option. If you aren’t using it, this field can be left blank
- This field determines where within the page you want to embed the survey, such as onto a specific button or element
You can preview some of the effects by opening the widget with the “feedback” button. This button and other visual settings can be changed in later sections:
Widget Styles
This section lets you determine some general cosmetic options for your widget. It is broken into three sections, one for each button in your survey.
- Question Font
- Font that you want the widget text to use.
- Text Color
- Color that you want to the text in the widget to display with (colors should be hex codes).
- Ground Color
- Color that the background of the widget will use (colors should be hex codes).
- Corners
- Determine the shape of the corners of the widget
- Background overlay
- Determines if the background overlay will appear for the widget
- Shadow
- Determines if you want the widget to display a “shadow”
- Progress bar
- Enables the progress bar for the widget
- Powered by Netigate
- Shows a disclaimer that the widget was created by Netigate
- Border Color
- Tick box determines whether the color is active, open field determines the color (colors should be hex codes).
- Survey button
- Toggles the visibility of the survey button.
Button Styles
This section lets you configure the survey button that lives on your site or app. Clicking this button will manually cause the survey to appear. The survey button is positioned at the edge of the browser window, and follows the visitor as they scroll. It is visible above all other content. The following button options are available when the survey button is enabled:
- Button text:
- Define the text on the survey button. max 40 characters
- Position on Screen:
- Define the position of the survey button. Available options: Left, Right.
- Button Style:
- Determines whether you want the button to have a background color. Solid enables a background color. The color used is set by the “Button background color” field.
- Corners:
- Set the corners of the button to be rounded or angled
- Font:
- Determine the font for the button
- Button Text color:
- Set the color for the text the button uses
- Button Background color:
- The background color of the survey button. This color is displayed when Button Style “Solid” is used.
- Border Color:
- Color used for the border of the button. Enabled through a checkbox next to the text.
- Hover State:
- What happens when a user hovers over the button
NOTE: There are multiple button styles that you can configure, for each button in your survey. You may need to scroll to see all customization options.
Domains
Adding domains is optional. By adding a domain you can restrict where you want the Widget to appear. For example, if your website URL is “www.example.com”, installing it there will cause the widget to appear on every sub page from that domain.
However, you may only want the widget to appear on “www.example.com/feedback”. In that case, you can use this setting to tell the widget to only display on these domains, even it the widget itself is installed across the entire site.
When using the “Embedded” Display option, using a specified domain is recommended.
Configuration
This section contains some miscellaneous settings about the way the widget operates.
- Devices to display on:
- Note that by choosing to only display your survey to users on desktop or mobile devices, this will never be 100% accurate. Virtual machines, as well as some firewall and security settings, will prevent device identification. In cases where we cannot identify the device, the survey will not appear.
- One answer per respondent:
- This will prevent users from filling out the survey twice. This logic is done based on a cookie in the users browser – meaning if they reset their browsers cookies, try from a different browser, or different device, they will be able to take the survey again.
- Display Rate:
- Used to determine what percentage of visitors will receive your survey.
- Delay in seconds to appear:
- How many seconds before the widget is automatically opened to the page visitor.
- Additional CSS class(es):
- These CSS classes can be defined through the code itself, but we recommend you define them here. That way, in the future, you don’t need to edit the code directly in order to manage CSS classes – they can be managed directly from Netigate.
Get the widget code and integrate it on your website
After saving your changes, take the code snippet and run it on your website.
To do so, click Get code at the top right of the Widget page after saving your changes. You can also find a Get code button for each widget distribution method in the distributions list of the survey.
There you can find the Widget’s main code snippet enclosed in HTML tags. Copy the whole script to paste it as HTML at the end of <body> in your website’s HTML document.
Reminder: Make sure the survey end date has not already happened, that the start date is in the past, and the survey is Activated. Otherwise, the widget will not appear on your site.
Using a Custom Trigger in your code
A custom trigger allows you to have the Website Widget appear when certain conditions are met. You need to add an ID to a custom trigger, such as button or link. Buy using this low code approach you can trigger the pop-up modal with the survey with out needing to code Javascript.
Both HTML id and class can be used to assign a trigger.
This display option is best used when you want to trigger the pop-up modal on a element on your site, but you do not have access to change or update the code. You can use any clickable HTML element already existing on the page to trigger the modal.
How to use
-
Create a survey for our purpose that you want to use on your site.
-
Create a Widget distribution
-
Go to Display options in the menu to the left.
-
Select Modal and add a ID or class in the field Custom trigger (optional).

In this example we will use class
.SignupSurveyButtonas trigger.On the site we have a button that has the class
.SignupSurveyButtonthat we want to use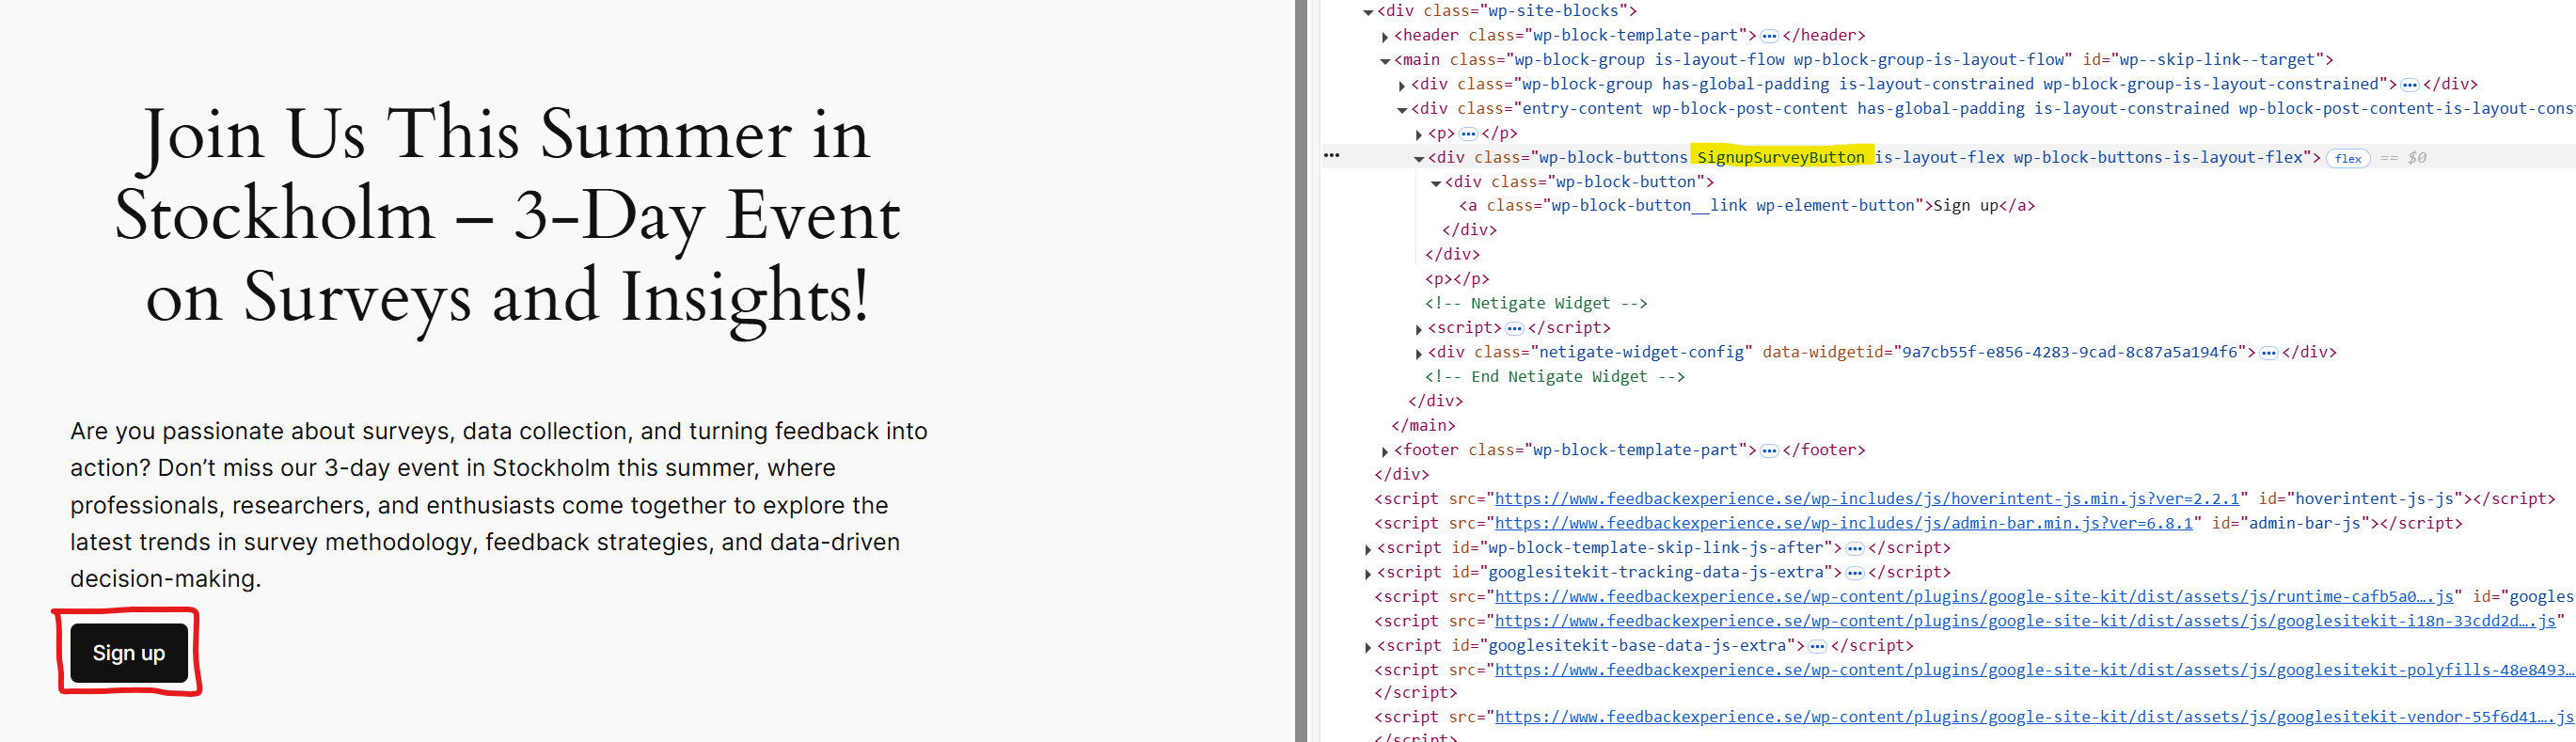
-
Save your widget options.
-
Get the script using the “Get code-button” and add it to your site.
Custom script
You can use a custom script to trigger the survey. Using Javascript you can trigger the pop-up with they survey to show when you want to.
This option is best used when you want to have more control when the survey should should be shown. It requires that you know how Javascript works and have access to change and publish code to your site.
Use the following function to call the widget:
netigateWidget.openWidget();Example script for using a button to trigger the widget. The ID of the button is SurveyButton
<script>

document.addEventListener("DOMContentLoaded", function () {

    const SURVEY_BUTTON_ID = 'SurveyButton';

    const surveyButton = document.getElementById(SURVEY_BUTTON_ID);

    if (surveyButton) {

        surveyButton.addEventListener('click', () => {

            netigateWidget.openWidget();

        });

    } else {

        console.warn(`Elementet with id '${SURVEY_BUTTON_ID}' could not be found.`);

    }

});

</script>
However, any event can be used to trigger the the modal – such as users leaving the page, or scrolling down page, taking certain actions, etc. You are limited only by your imagination, effort, and the code base that your website supports.
How to use it
-
Create a survey for our purpose that you want to use on your site.
-
Create a Widget distribution
-
Go to Display options in the menu to the left.
-
Select Modal as display option (do not add a identifier in the Custom trigger (optional))
-
Save the widget options.
-
Get the script for the widget and add it to you site.
-
In this example we will add the following Javascript code to trigger the modal when a button with the ID
SurveyButtonis clicked<script>
document.addEventListener("DOMContentLoaded", function () {
const SURVEY_BUTTON_ID = 'SurveyButton';
const surveyButton = document.getElementById(SURVEY_BUTTON_ID);
if (surveyButton) {
surveyButton.addEventListener('click', () => {
netigateWidget.openWidget();
});
} else {
console.warn(`Elementet with id '${SURVEY_BUTTON_ID}' could not be found.`);
}
});
</script>
Using Google Tag manager with the Feedback Widget
After installation onto your site, you have the option to configure how the Widget displays based on logic created in Google tag manager. This means that you can choose to display the widget when actions are taken like:
-
- Downloading a file
- Inputting text into a field
- Landing on a certain page
- Only displaying to certain users
- And more…
Using Google Tag manager to create these rules would be customer specific. Meaning, the way that a trigger is setup for you might be different than how it gets setup for someone else. Due to this, it is difficult for us to create examples on how you might create rules.
Instead, we recommend you work with a developer on your side, or even with Google Tag Managers Help Center, to determine how best to create these triggers for your specific sites code base.
Can you please provide more feedback so we can make this article better?